Our Homeschool Journal: Jumping in Leaves and Playing in Snow!

It’s beginning to look a lot like Christmas…

We had our first real snowfall this week.  The kids were very excited when they woke up and immediately bundled up and headed outside.  They played for an hour and a half before breakfast!  Our flexible schedule was key, because by afternoon the weather changed to sleet and then rain and melted all the snow.  By the way, being able to sit inside with my coffee while they built forts and a snowman was quite nice.  I only had to wipe a nose and fix mittens a couple times when they came to the door.  Our tradition on the day of the first “real” snowfall (enough to accumulate on the ground) is to make snowflake sugar cookies.
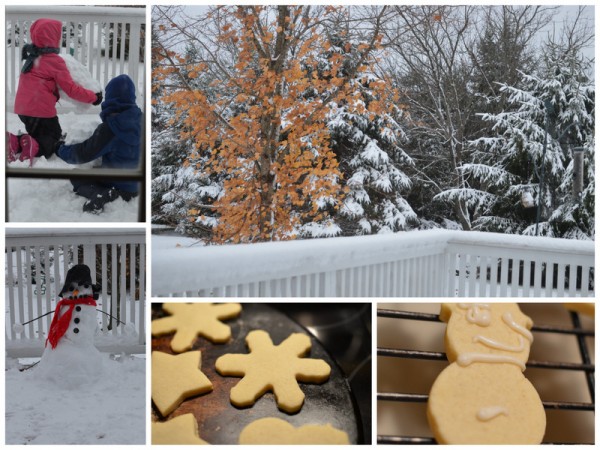
First Snow Collage

In our homeschool this week…

We finished our election unit study and lapbooks, and of course took our field trip to vote!  I’m happy I did this unit with my kids.  My ten year old daughter was especially engaged in the topic, and we had so many important conversations throughout the election season and after the results were in.  I’m glad for the opportunity to homeschool and be the one to educate my children on such weighty topics.  Now my daughter wants to run for state representative when she’s 18!

We had a whole day at home (finally!) on Thursday and that gave us time for an art project.  These two cute scarecrows, made using a tutorial from Art Projects for Kids (our favorite resource this week) now brighten up our art wall.  When possible I like reading a related picture book before art projects, and the beautiful illustrations by David Diaz in The Little Scarecrow Boy by Margaret Wise Brown helped inspire our art.  It was our first time using wax resist with watercolor and I enjoyed watching their amazement at the effect.
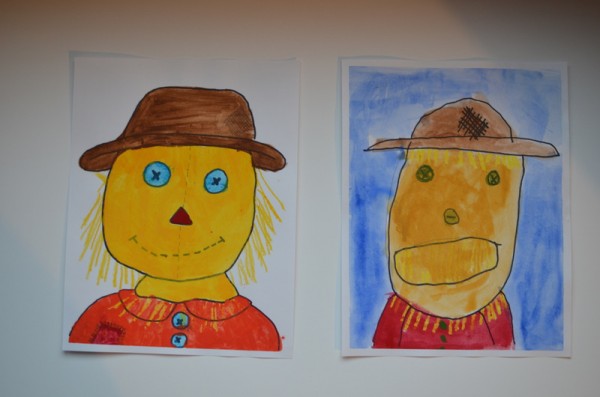
Scarecrow Art Project

The rest of our time we filled with the three R’s, history, and nature study (focusing on trees).

Helpful homeschooling tips or advice to share…

Don’t be afraid to cut out an activity–even if it’s a good one–to balance your time out and time at home.  Our first year of homeschooling I was afraid we wouldn’t be able to meet homeschoolers in our area and have activities with others to balance our time alone at home.  Luckily my fears were unfounded, but this year I’ve found we had a little too much going on.  Our geography club was meeting once a week, and in addition to going to the meetings there was quite a bit of preparation involved.  We finally talked about it as a group and found we were all feeling over scheduled!  We’ve changed to one meeting a month and hope that allows us to carry on a good activity without burning out.

Places we went and people we saw…

At my daughter’s Girl Scout meeting my husband taught them all about geocaching.  He hid a temporary one for them to find and despite frigid temperatures they had a blast!  My daughter also had a piano lesson and my son had Boy Scouts.  It was a good week with a little more time at home than we’d had lately due to the change in geography club and a cancellation of a Friday meeting.

My favorite thing this week was…

Taking down the Halloween decorations and putting up the Thanskgiving ones–my favorite is our “Thankful Tree” which helps us focus on our blessings.
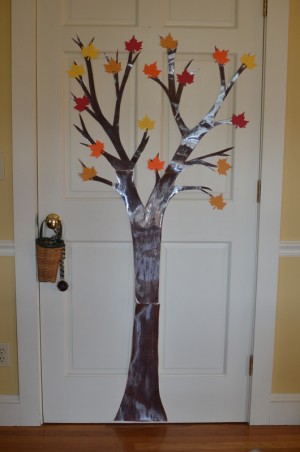
Thankful Tree

And we may or may not have played Christmas music on the day it snowed.

What’s working and not working for us…

I already mentioned the change in schedule that has helped ease the feeling of always being on the run.  The other thing I added this week was a different chore system.  We’d been using a pocket chart with little cards for chores.  It wasn’t working as well this year for several reasons:  it was outdated because my kids can help with more jobs now, it made extra work for me switching cards in pockets, and it wasn’t easy to have jobs that they do once a week versus daily (unless I kept track of what days to put them in their pockets).  I was inspired by Mary’s chore chart at Homegrown Learners and created a simple spreadsheet:
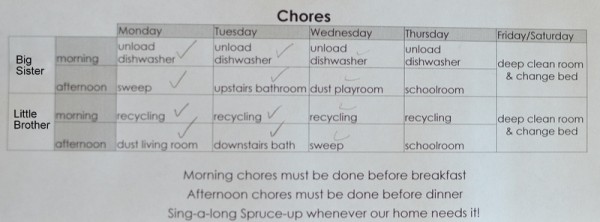
Chore Chart

Now the kids have the morning chores that they previously had, plus I’ve added an afternoon job that helps keep the house cleaner over the course of the week.  The initial reaction to the news of an extra job was pretty poor, but after the first week they found it wasn’t too bad, and they liked the variety of a different job each day.

I also was inspired by Colleen at Raising Lifelong Learners and will be adding a “job jar” with chores listed on popsicle sticks.  I will use this for punishments, and it will include rarely-done jobs like wiping down the baseboards, windowsills or kitchen cabinets.  Colleen’s philosophy behind this system is worth reading.

We’re reading…

  • We are listening to the audio version of By the Shores of Silver Lake.  We enjoy it, but not as much as the other Little House titles so far.
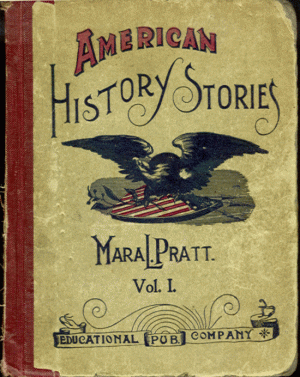
  • We are loving American History Stories by Mara L. Pratt from Heritage History on the iPad. You can read my review of Heritage History.
  • Our homeschool book club title is The Hobbit.  I have to say I’m not a fan of fantasy, my daughter appears to have the same opinion, and my son fell asleep while I was reading.  I am usually a stickler for avoiding abridged versions–we just finished the unabridged Treasure Island and loved it.  This time I gave up and we are listening to an audio dramatization.
  • Our current poetry anthology is Nature in Verse by Mary Lovejoy, and we’ve had cozy mornings reading through the autumn section.  It is a free selection from Google Books that was recommended by Barb at the Handbook of Nature Study blog.
  • My daughter is reading Little House by Boston Bay by Melissa Wiley, Masterpiece by Elise Broach, and So You Want Women to Vote, Lizzie Stanton? by Jean Fritz.
  • What am I reading?  I have a couple lofty goals all of a sudden.  While reading the section on trees in the Handbook of Nature Study by Anna Botsford Comstock I realized I’d love to go through the whole book cover-to-cover.  It’s filled with great information, and though I’ve used it to look things up I feel like I’m getting just bits and pieces of a treasure trove.  The other lofty goal: I downloaded Charlotte Mason’s original books from Ambleside Online.  I would like to read them.  I’ll let you know how that goes.  Perhaps I will think better of this goal once I start and switch to one of the modern English versions.

A photo, video, link or quote to share…

Just thought I’d show you the additions our cat made to my writing on our family mission statement when she sat on my computer keyboard.  She loves to sit there because of the warmth.  Once she hit a key sequence that turned everything on my screen sideways.  Another time my computer began reading aloud anything I moused over.

Continue reading

Review: Heritage History

Help your kids love history with Heritage History

It is important to note the difference between history books and textbooksA history book tells true stories from the past, while a textbook focuses on facts, names and dates without room for the the story.  The distinction is so important to me!  I disliked history classes in school, probably because I’m just horrid at remembering names and dates.  I love a good story, though, and have been falling in love with history as I teach it to my kids using living books.  A company called Heritage History has this philosophy:

What we consider essential is not perfect retention of a particular set of historical facts and concepts but an abiding interest in history itself.”

Sign me up for that!  The more I homeschool the less I feel I learned in school, and the more I realize I can’t teach them everything that is valuable to know in all subjects.  I really have to focus on creating lifelong learners so that they will continue to learn and be curious their whole lives.

Heritage History collects historical books in the public domain and re-formats them for use with digital e-readers.  Hundreds of these books for young people are available for free to read on their website, but they also sell CDs with collections of books formatted specially for printing or reading on several different devices.  Titles are limited to only those with expired copyrights and therefore the time period covered does not extend beyond the early 1900’s.

There are two types of CDs offered:  one is a library CD that is a grouping of books on a specific time period or civilization, the other is a curriculum CD that can function as a stand-alone history curriculum because it includes the books plus maps, timelines, recommendations and accountability forms.  Heritage History also promotes using their books as a supplement to other history programs.

I was given the opportunity to review a Heritage History CD and chose Early America because that is the time period we are already studying.  The CD contains the book files as MOBI (for the Kindle), EPUB (for devices like the iPad) and also pdf (so you can print them).  I am trying to avoid using reams of paper and loads of ink, but needed both the other files for my daughter’s Kindle and our iPad.

Loading the Books onto Multiple Devices

The CD arrived on a day my husband (better known around here as Mr. Tech Support) was working one of his 24-hour shifts.  I placed it on my desk figuring to wait for his assistance; my usual routine with technology is to wait for Tech Support.  You can read about my technology phobia here.  Later in the day I was struck by the desire to figure this one out for myself.  Perhaps I’d had too much coffee.

I sat down with my multiple electronic devices (that could cause hives all on its own!) and popped in the CD.  Very simple instructions are available right on the CD case and on Heritage History’s website.  Ten minutes later I had books loaded on the iPad.  Can I just pause for a moment to say that the iBooks interface with the wooden bookshelf is so cute?  I love the attractive visual, and though it was a new program for me I quickly figured out how to open books, check the table of contents, and bookmark pages.

My iBookshelves loaded with classic history titles from Heritage History


I texted Mr. Tech Support that I was now the technology guru of the house.  I was totally impressed with myself, but really it’s a testament to the super-easy-to-follow instructions.

How We’re Using Heritage History

Our main history curriculum is the Early 19th Century Time Traveler’s History Unit from Homeschool in the Woods.  I chose it for the general schedule of topics, top-notch printables and hands-on activities, but planned to supplement heavily with living books.  We’ve been working through the unit, but finding the living books is not always easy.  Our town’s library is small so I make frequent use of inter-library loan.  One problem is timing my requests so I have it in our home by the time I need it, but not too early or I’ll have to return it before I’m done.  I am also limited in the overall number of books I can request.  I’m trying to keep our budget low so buying a lot is not an option.   Heritage History is filling a real need in our homeschool and has simplified my life.

I began American History Stories by Mara Pratt as our read aloud for history.

American History Stories cover

It is a four-volume set covering American history from early explorers to the end of the Civil War.  I am delighted with this selection!  It’s so enjoyable I decided to back up and pause our other program as we read from the beginning to refresh our memories from when we started studying American History last year.  Mara Pratt’s writing style is very engaging as a read aloud:  she draws us in and makes us feel as if we’re watching the story unfold before our eyes.  Here’s an example as she talks about the Pilgrims on the Mayflower arriving in Plymouth Harbor in December:

Now, it seems rather cruel to leave these wanderers out in the cold storm; but we must for a few moments, while we hurry over to England to learn what had happened there to force these men and women across the ocean at this stormy time of the year.”

My kids are enthralled!  They are listening like they do to exciting books like Treasure Island.  They stop me to ask questions or share their feelings.  You should have seen their faces when I read about the missing colony at Roanoke!  We had studied that colony but it didn’t hit their emotions the way it was presented last year.

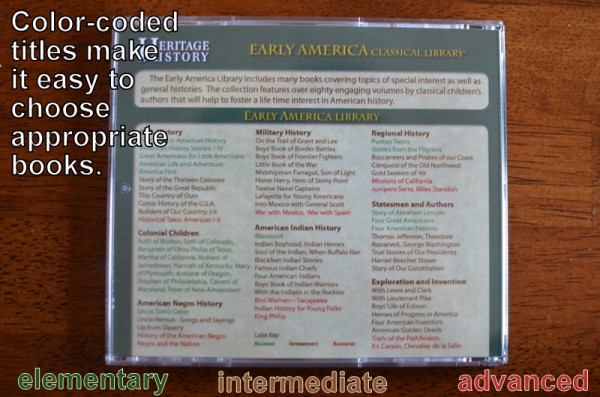
With my new-found technology guru status I also loaded up my daughter’s Kindle.  I printed the book summaries from the CD and allowed her to pick any books in green (everything is color-coded so you know what reading levels the books are).

Heritage History CD with Color Coded Titles

Ten minutes later she had a dozen new books on her Kindle which made her one happy girl.

My ten-year-old daughter’s opinion:  She was very excited that there were illustrations (most of the free books we were loading onto her Kindle did not contain the original illustrations).  She has been reading through America First, a collection of “100 interesting and romantic incidents from America’s history.”  My daughter’s quote: “the stories are told very nicely in a straightforward way and are easy to understand.”  She is enjoying America First for quick reading, as each chapter can stand alone as an interesting story.  In fact, it prompted her to begin writing a historical fiction story about a girl on the Mayflower.  I was thrilled that already right on her Kindle are several history books she can use for research on this time period.

The Early American CD is a library CD, not a curriculum CD.  I enjoy hands-on learning and interesting ways to narrate what they’ve learned (minibooks, notebook pages, unique writing assignments) so using another main curriculum for activities, printables, and other suggestions along with reading quality literature like the books from Heritage History works well for me.  I can see this being a part of our history studies for years to come.  This one CD has over 80 books for reading levels up to high school–at a retail price of $19.99 that is only a quarter per book, not to mention that each book is available in multiple formats!  There are books I can just imagine my son loving when he is older that cover military history and inventors.  It’s an economical choice–both financially and in terms of space on our already-full bookshelves.

Check it Out for Yourself:

The Heritage History website is full of information–lists of all their books, their library and curriculum CDs, more on their philosophy and even suggested courses of study.

If you decide it would work in your homeschool, Heritage History has a special offer for my readers.  Until December 31st you can get the Early America library CD (regular price of $19.99) for FREE with the purchase of any of their curriculum CDs (regular price of $24.99).  Simply add a curriculum CD and the Early America CD to your shopping cart and enter the discount code SCHOOLRM at checkout and the cost of the Early America CD will be deducted. 

I received the CD for free for the purpose of reviewing it.  These opinions are my honest thoughts after using the product in our homeschool.  As an affiliate I receive a commission from Heritage History when you use the discount code.

Our Thankful Tree

Our favorite decoration for the Thanksgiving season is our Thankful Tree.

Our Thankful Tree

I made the tree from brown craft paper that comes on a roll.  I taped a piece onto a door in our main living area and sketched a tall tree.  Don’t worry, it’s easy–I used this tutorial for how to draw a fall tree from Art Projects for Kids, minus the leaves!  I covered the sketch with contact paper before cutting it out so I can reuse it year after year.  I simply tape it to the door and we’re ready to add our leaves.

For leaves we use leaf shapes I cut out with my Cricut.  If you don’t have a Cricut or similar paper cutting device, there are lots of other options: have your kids cut out leaves (hey, just call it fine motor skills practice), buy a leaf paper punch at a craft store, and I’ve also seen packets of silk and paper leaves for decorating and bulletin boards at craft and dollar stores.

Every night at dinner we each write something we’re thankful for on a leaf and add it to our tree. Our leaves usually include everything from family members and our health to Legos and coffee.

We started doing this a couple years ago and it has become a cherished tradition.  It’s a way to focus on all we have to be thankful for during the Thanksgiving season, not to mention a reminder of our blessings before the season that encourages kids to think of lists of wants.

Our Homeschool Journal: Halloween Fun & Lots of Socializing

Homeschool Journal Collage 11.2.12

In our homeschool this week…

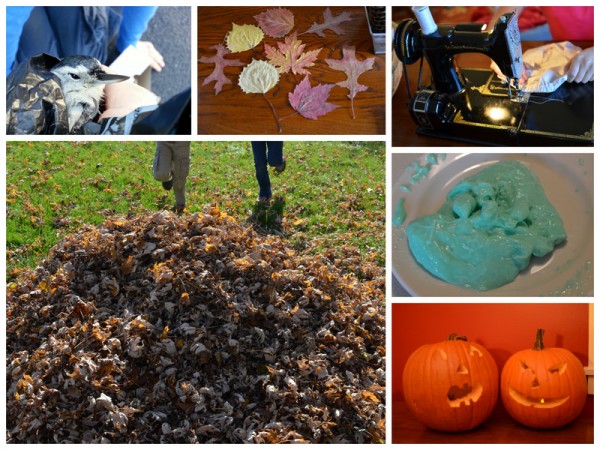
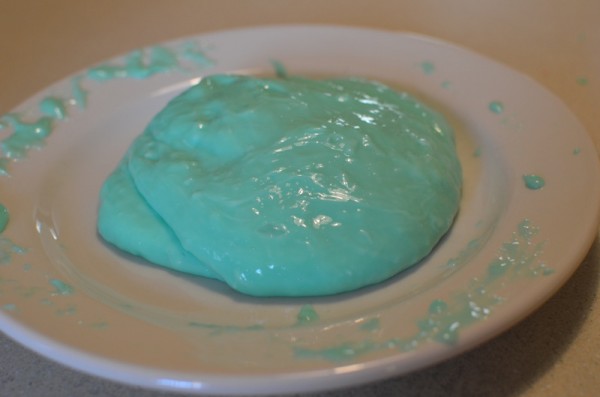
We slipped back into nature study with tree poetry (and rescued a baby bird in the process).  We worked on our election lapbooks.  My daughter sewed the bonnet to go with her Laura Ingalls costume (sewing is a tremendous living math lesson).  I made the last-minute decision that we would not do our regular schoolwork on Halloween and instead we made caramel corn and homemade slime and carved pumpkins!

Places we went and people we saw…

We had a few normal events: Girl Scouts, Book Club and piano for my daughter, and Geography Club (Egypt this month) for both.  We had great Halloween fun at a friend’s house with games and lots of food.  I took the kids swimming at the pool.  My son is now old enough that I don’t have to get in the pool with him…sitting on the bench reading while they burned off loads of energy was great fun for all.  Today we’re meeting our fellow book club members for a Treasure Island play.  Saturday is a day of Scout activities for both kids.  (This is one of those weeks when people’s concerns about socialization make me giggle.  Or pull my hair out.)

My favorite thing this week was…

The yearly jumping-in-leaves ritual.  We had a big raking and jumping party since a storm was coming and those crunchy leaves would soon be a big soggy mess.   As I watch the kids laugh and jump slideshows play in my head of them doing this same thing together through the years.  So many giggles and my camera snapping away.  When will they be too old to jump in leaves?  Hopefully never!

My favorite resource this week…

My daughter and I started the next lesson in WriteShop Junior D and it was my favorite resource this week.  We are both really enjoying the structure of the whole program.  One of the brainstorming games this week was so fun that she and her little brother played it after school time.  I’d say that’s a winner!

What’s working for me…

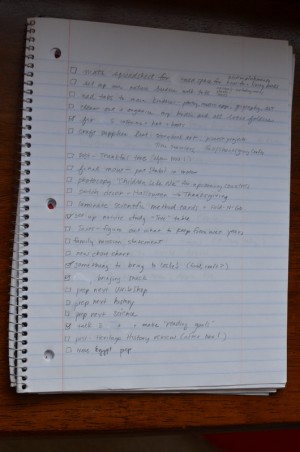
One of the chapters in Jamie Martin’s ebook Mindset for Moms was “Only do six things today.”  I keep a to-do list going at all times, rewriting and transferring to a new list when needed.  I love lists, and when I feel overwhelmed it often calms me to make a list.  My to-do lists are a bit monstrous by necessity, but I also tend to put crazy things on there like “organize the garage” or “finally pack up all our tax paperwork from 2011–perhaps before 2013.”

My Long To-Do List

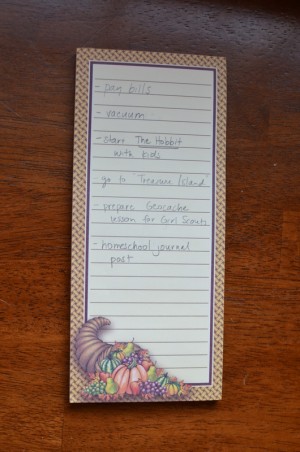
I like getting things out of my brain and onto a list…the problem is the sheer size of the list and going about my day without actually crossing things off.  Jamie’s idea of “six things” made a lot of sense.  Now in addition to my loooong list where I can put things that I need to be working on (like planning a unit study or preparing for Girl Scouts or Sunday School) and things I would like to do when I have time, I have a list of six things that need to be done that day.

My 6 Things List

I make it the night before or in the morning, checking our schedule and my long list to prioritize.  It could be related to paperwork, housework or homeschool…do-able tasks that I will complete that day.  I feel more accomplished at the end of the day and the must-do’s aren’t getting lost in my long list of would-like-to-do’s.  I’m not sure Jamie meant have a super long slightly unrealistic list and then a six things list, but this seems to work for me.

We’re reading…

We are listening to the next audiobook in the Little House series: By the Shores of Silver Lake.  I have been reading American History Stories by Mara L. Pratt from Heritage History on the iPad.  (I was sent a CD of their Early America library to review–post coming soon.)  My daughter is reading Little House by Boston Bay by Melissa Wiley, Masterpiece by Elise Broach, So You Want Women to Vote, Lizzie Stanton? by Jean Fritz, and also some Heritage History titles on her Kindle.

I’m grateful for…

I could probably say “our flexible schedule” every week, but I was reminded of it yet again.  As we get ready to head to a play together of a book we read together and even Daddy gets to go I was hit by the unusual amount of family time we enjoy because we homeschool.  My husband is a firefighter/paramedic with an irregular schedule and homeschooling allows us to catch his days off to be together.  Not to mention how many different directions we’d be heading in if the kids were at separate public schools.

I’m praying for…

All those affected by the hurricane.  I feel silly for complaining about my mini basement flood last week which was nothing compared to the devastation many have experienced this week.

A photo, video, link or quote to share…

Thank you to the wonderful hostesses with fun link-ups on Fridays. Be sure to join the fun and see what other homeschoolers are up to!

Favorite Resource This Week

Have Some Gooey Fun with Homemade Slime

The kids and I had to have a little fun on Halloween.  We don’t enjoy the scary, gory side of Halloween, but a little slime is a lot of fun.  This recipe came from my son’s preschool teachers.

Gooey Fun with Homemade Slime

Ingredients:

  • 8 ounces of Elmer’s Glue (must be Elmer’s)
  • 1 cup cold water
  • 1/2 cup hot water (not boiling)
  • 1 tablespoon Borax
  • food coloring

Directions:

  1. Mix the cold water and glue in a mixing bowl.
  2. In a separate bowl mix Borax and very hot water.  Stir well until the Borax is dissolved.
  3. Add about 10 drops of food coloring to the Borax mixture.  (For fun you can also add glitter now.)
  4. Slowly add the Borax mixture to the glue mixture.  Stir with a spoon for just a few seconds, then immediately mix with your hands.  In less than a minute you’ll have a gooey, non-sticky, stretchy material.
  5. Store in an airtight container.  Refrigerate when not using and it will keep for several weeks.

Have fun sinking your hands into this gooey, slimy concoction.  It is icky and fun all at the same time.  It’s fun to give as a little non-sugary treat, too.  We’re bringing some to our friends today!

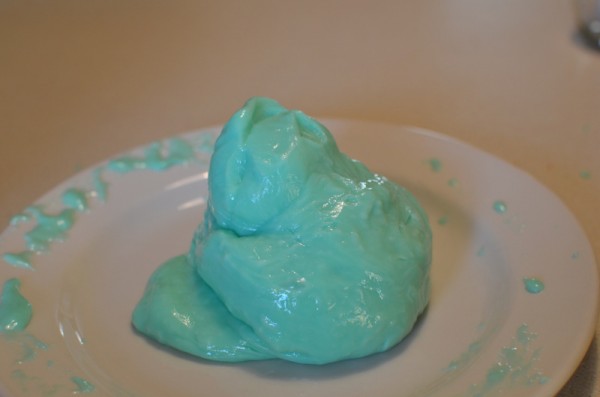
It will take on a shape for a moment…

Homemade Slime One

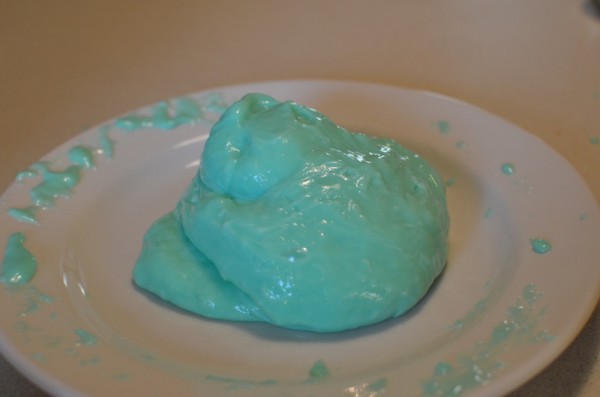
then slowly

Homemade Slime Two

ooze back into a wobbly lump.

Homemade Slime Three

Happy Halloween!

Nature Study ~ Kicking Off Our Focus on Trees With Poetry

I’d intended to start our nature study focus on trees a couple weeks ago when the beauty of the fall leaves was at its peak in Maine, but we were very busy preparing for our science fair.  Then my basement flooded and messed with all my plans!

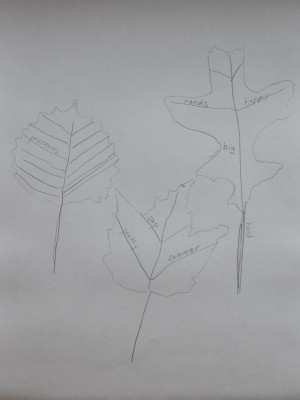
To get back into the swing of nature study (and do something that didn’t require a lot of planning or knowledge from me) we took a walk around our neighborhood using the ideas in Barb’s Outdoor Hour Challenge #2, Use Your Words.  My daughter recorded a list of the words that came to our minds when we looked at all the trees on our walk.  Our neighborhood is fairly young (20 years), and though most house lots had originally been completely cleared there are woods surrounding the neighborhood and many lawns are adorned with a variety of trees.  I’ve enjoyed paying particular attention to the variety of leaf color and timing for the change.  Many trees in our neighborhood are now bare, but a maple in our back yard is just glowing with gold leaves now.

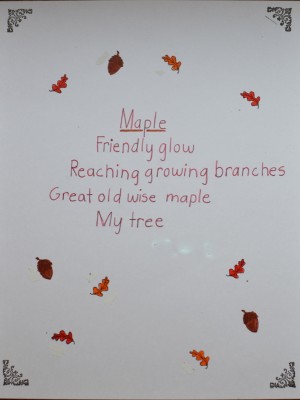
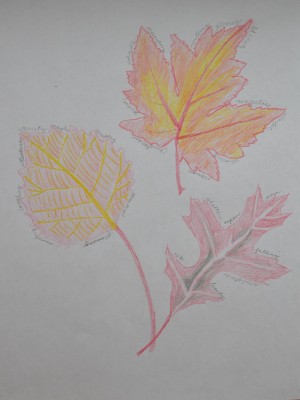
The next day as the rain poured down and the wind howled, we spent a cozy evening turning our words about trees into poetry using Barb’s free printable with easy suggestions.  Each of us used a different idea.  My son (age 7) traced leaves I had pressed weeks ago, added veins, and I wrote his selected words inside the leaves.

Tree Poetry 7 Year Old

My daughter (age 10) was intrigued by the cinquain idea.  I was very proud of her work.

Tree Poetry 10 Year Old

I joined the fun (the kids love it when I do).  My particular interest was noticing the pattern of colors on each of the pressed leaves I traced.  I wrote my words around the perimeter of my leaves.

Mom's Tree Poem

Our poems are hanging on our wall, and we are excited to spend some time studying trees.  Our first question:  why do leaves change color?

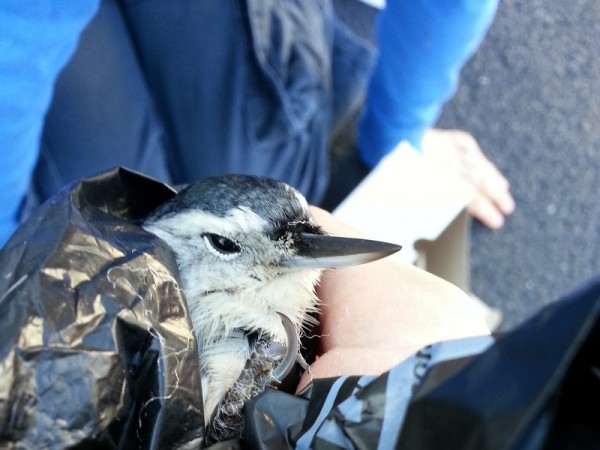
Before I end I have to add a note.  On our walk some movement in a fake spiderweb at a neighbor’s house caught my eye.  I looked closer and realized a small bird was caught.  Long story short, we had to help him.  The neighbors were not at home, but with the help of another neighbor and her scissors we soon had this beautiful nuthatch free from the web.  He was very shaken up but did not appear injured.  After some time in a box and some conversations with a bird rescue organization he flapped away from us up into a tree.

Rescuing a Nuthatch

We had to leave an hour later and he was still there.  We named him Webber and hope he goes on to live a long and happy life.  The woman who answered my calls at the bird rescue organization told us that often owls get trapped and end up hanging for hours by a wing or leg.  I tell this story because after we saw firsthand the danger of those fake spiderwebs to wildlife I said I’d spread the word.  This is my little part of helping the birds.

Our Homeschool Journal: Our Mini-Flood

Most of my plans went out the window (or should I say into the basement) this week after finding an inch of water covering the floor throughout our basement.  Mainers reading this may chuckle, since water in Maine basements is not uncommon.  We’ve lived here five years and not had any, so I’d grown complacent and had lots of things in cardboard boxes on the floor.  Needless to say it was all hands on deck to get what we could high and dry, and I spent any “free” time the rest of the week drying things out, cleaning to ward off mold, and generally reorganizing since it was such an overhaul anyway.

A basement clean-out was not on my to-do list this week.  I am embarrassed to admit I was quite cranky about the job and that I had so much else to do, and, well, had a pity party for myself on several occasions.  I often talk to the kids about not grumbling when given work to do.  One of my favorite things is to quote Pa Ingalls: “What must be done is best done cheerfully.”

I was not a good example of that this week.  Luckily, despite me having a bad attitude many things went well this week!

In our homeschool this week…

Much less schoolwork was done at home than I planned.  However, my son wrote his first story he’d ever done on his own with invented spelling.  The “flood” was quite exciting to him and he wrote about it while I was frantically working.  He also taught himself counting by fives using the small numbers on his watch.  Mind you, this is on my “list of math goals” to teach him but I did not assist with this is any way.  He merely entered my room and rattled off until he reached 100 as I stood with mouth gaping.  That little guy always surprises me.

I am inspired by…

My friend Leslie (who blogs at Maineiac Homeschoolers).  She is leading our homeschool book club and our first meeting was outstanding!  We all (moms included) started Reader’s Response Journals (you must read her post that describes the journals).  Not only is it a great fit for our wide range of ages, but it’s one of those things I believe will become a favorite part of our homeschool and a treasured memento.

Places we went and people we saw…

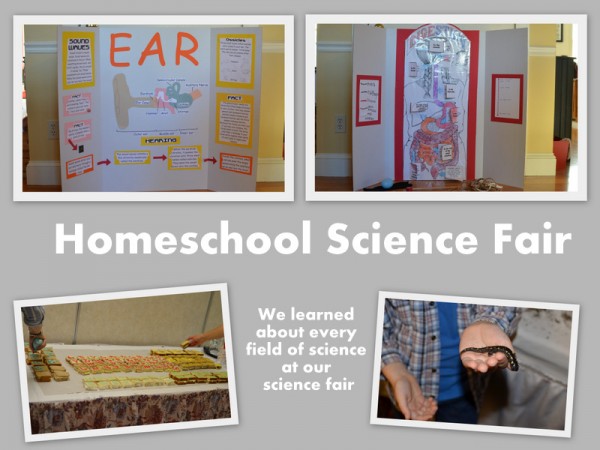
The big event this week was our homeschool group’s science fair.  My daughter’s project was the ear and my son’s was digestion.  (I posted yesterday about the hands-on digestion demonstrations that were a big hit.)  A lot of work by a lot of families led to a very fun and educational day.  My friend who arranged it is amazing–you can see the Periodic Table sandwiches she planned.  We had projects on so many topics and even a wide assortment of live creatures.  I’m already looking forward to next year!

Science Fair Collage

As I mentioned we had our first book club meeting this week, and other than those two events much of our time was spent at home…in the basement.

My favorite resource this week…

Beakman’s World!  Have you ever watched this show?  He’s a zany guy with even zanier hair who is willing to do just about anything to teach your kids about science, and never in a boring way.  His shows are all on Netflix and we watched several as we prepped for science fair.  My kids get a big kick out of him, and on every episode there is something you can try at home.  Probably the coolest one yet for us is building a camera obscura out of a box.

We’re reading…

We finished the audio version of On the Banks of Plum Creek and started By the Shores of Silver Lake by Laura Ingalls Wilder.  We also finished Treasure Island.  I just love reading these great books with my kids!  I read Jamie Martin’s ebook Mindset for Moms.  I enjoyed it and think I’ll re-read it frequently to remind myself of all the good advice.
I’m grateful for…

Living in an area where a little water in my basement and last week’s earthquake that caused no damage (and we didn’t even feel) seems like a big deal.  We’re generally free from natural disasters…just three feet of snow in our big Nor’easters but you can sit by the fire and sip cocoa.

A photo, video, link or quote to share…

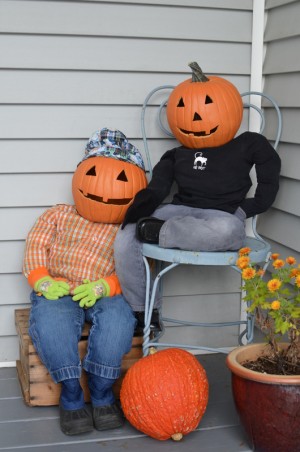
These guys took up residence on our porch this week (partly because the supplies to make them were in my wet basement).  We do this every year and my kids love it.  We fill old clothes of theirs with newspaper, and that is one of those fake pumpkins you can carve.  We use those because they last longer and aren’t so heavy for the scarecrow to hold up.

Scarecrows

Thank you to the wonderful hostesses with fun link-ups on Fridays. Be sure to join the fun and see what other homeschoolers are up to!

Favorite Resource This Week

Digestive System Demonstration

Digestive System Demonstration Supplies

For our homeschool science fair my seven year old son’s topic was the human digestive system.  He is a hands-on learner so I wanted him to have a physical demonstration to present.  I wanted a demonstration he could do with very little help from me and explain to an audience.  I’m happy to say that after several trials and adjustments at home his presentation at the science fair this week was a success!

Demonstrating the Steps of Digestion:

Want to show your kids the wonders of digestion?  This demonstration was great in front of a group of kids, but simple enough to do at home, too.  I am pretty sure my kids won’t forget the steps of the digestive process after this.

Supplies:

  • small dish (large enough to use masher in)
  • peanut butter sandwich
  • small amount of water
  • 1/2 cup milk
  • scissors
  • masher
  • funnel (optional)
  • quart size Ziploc bag
  • Coke
  • knee high pantyhose, or a leg cut off of child’s tights
  • large bowl or basin
  • tray with paper towels

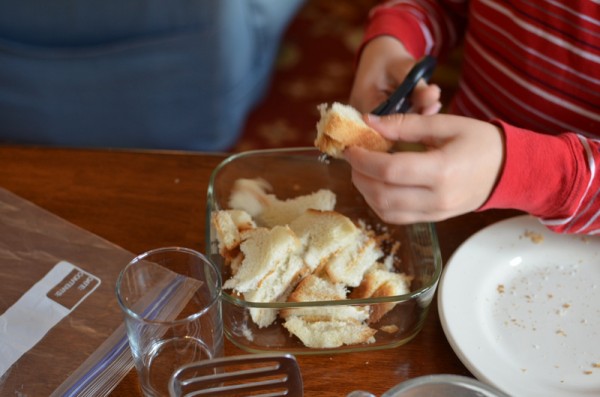
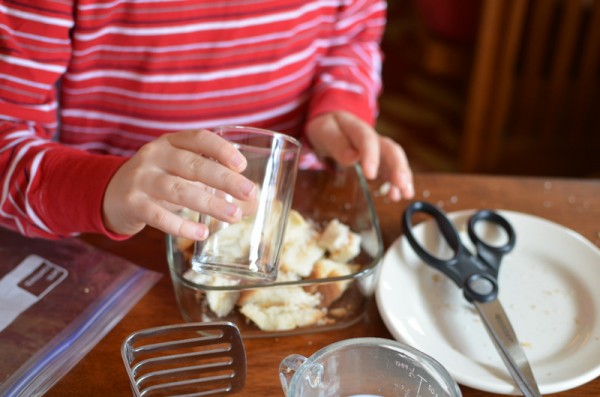
Step 1:  Explain that the small dish is like your mouth.  Begin to cut the sandwich into bite-size pieces, explaining that the scissors are acting like your front teeth, which are designed for cutting.

Scissors Act Like Front Teeth

Step 2: Pour in a small amount of water.  This is the spit.  (Expect giggles here.)

Pour Water In For Spit

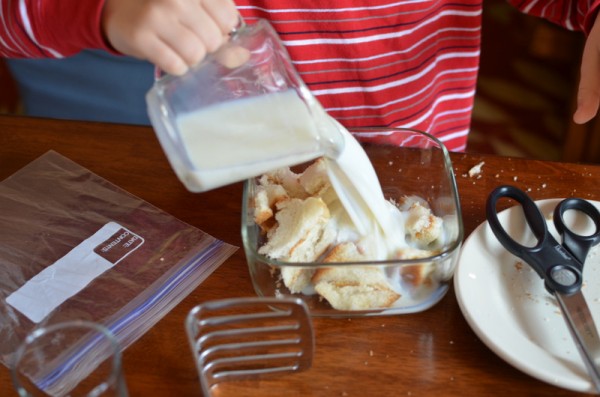
Step 3: Add about a half cup of milk.  Peanut butter sandwiches can be a bit dry, you know.

Add Milk

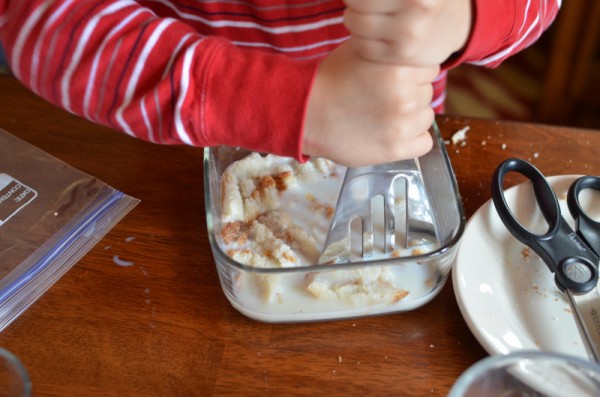
Step 4: Use the masher to mash the food and drink, explaining that the masher is like your back teeth which are designed for grinding up the food.

The Potato Masher is Like Your Back Teeth

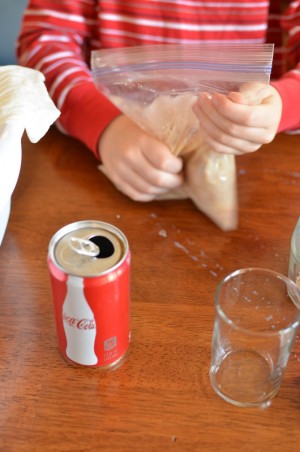
Step 5: Once the sandwich and milk resemble slop, empty it into the quart size bag which you can explain is like the stomach.  You may dump it directly in the bag, or through a wide-mouth funnel to stand in as the esophagus.  This process required an extra set of hands, thus a lack of photos for this step!

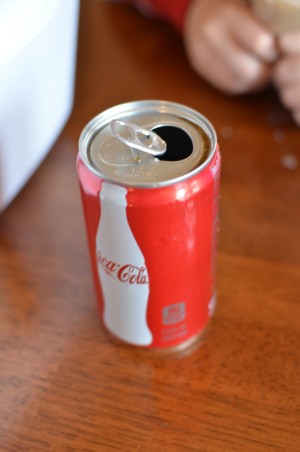
Step 6: Add a little Coke.  Explain that the stomach has chemicals (acids) that break down the food.  [Note: Saliva also works on food break down as do other enzymes and bile added in the small intestine–given the age of my son I kept it simple.  You could certainly add a little green food coloring and talk about the liver, gallbladder and bile…then there’s the pancreas…]

Coke is Our Stomach Acid

Step 7: Using your hands mix the food and Coke in the bag.  Explain how your hands are working like the muscles in the wall of the stomach mixing and churning this slurry.  This is when it starts looking a little gross.  (Depending on your audience you could pause here and mention the process of vomiting.)

Our Hands are Like the Stomach Muscles

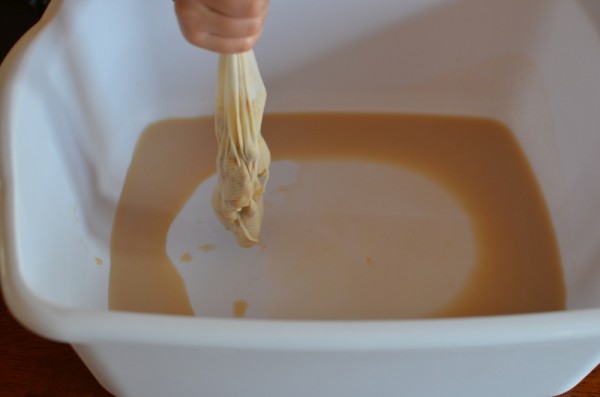
Step 8: Now the food is ready for the small intestine.  Have your basin ready and pour your slurry into the nylon.  Liquid will leak out through the material.  You can explain that the fluid is like nutrients your body is removing from the food in the small intestine.  Feel free to squeeze a little for effect.

Nutrients are Removed in the Small Intestine

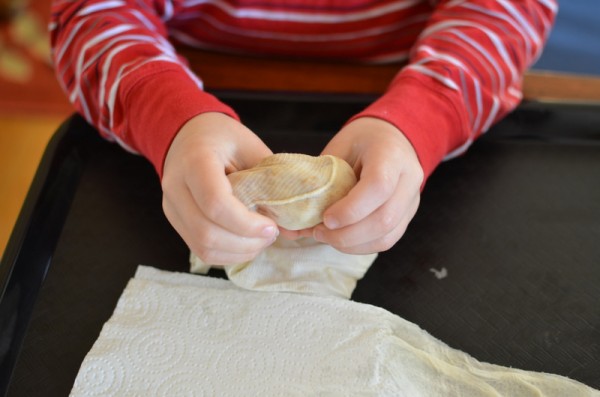
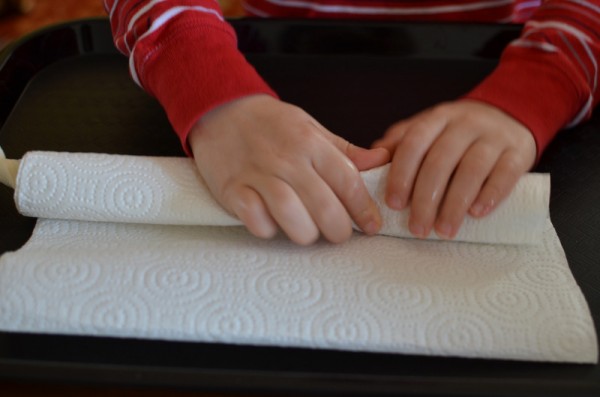
Step 9: Now for the large intestine.  You could squeeze the food into a second nylon, but we just stuck with one and explained that the food was now moving into the large intestine.  Lay the nylon on multiple paper towels layers and roll it up tightly, squeezing and patting as you go.  Explain that our body takes all the available water out of the food that remains in the large intestine.

Large Intestine Removes the Water

Step 10: That’s where we left it at science fair.  We’re pretty relaxed around our house, especially in the name of science discussion.  But I didn’t want to offend any other families so we chose our words carefully and left the “remains” in the nylons with a simple explanation that the next step would be the toilet.  (You can cut a small hole in the nylon and demonstrate the working of the anal sphincter if you want to get technical.)

What Remains of Our Food

These are a couple of the websites and videos that gave me ideas to try: Teaching in Room 6,  and this Squidoo lens.

In addition to demonstrating the steps in the digestive process we added two other hands-on components that were so simple yet illustrated so much.

Demonstrating Peristalsis:

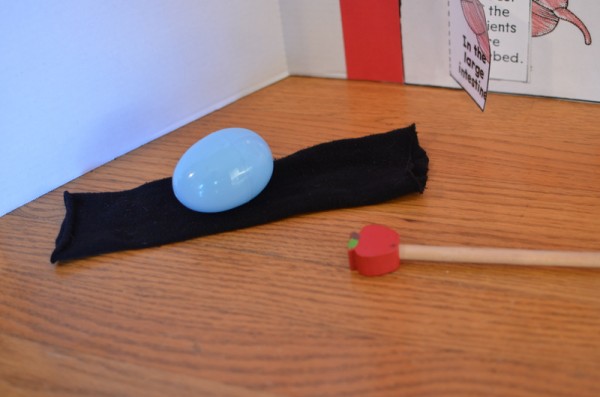
How does food move through the digestive system?  It’s simple to demonstrate.  Take a section of nylons or tights open at both ends and a smooth round object.  I used my 10-year old daughter’s tights and one of the large plastic Easter eggs.  Hold the section of tights up with the round item in it, showing that gravity is not forcing the egg through the tights.  Using your hands you can demonstrate the contraction of muscles that pushes the food through.

Peristalsis Demonstration

Visualizing the length of the digestive system:

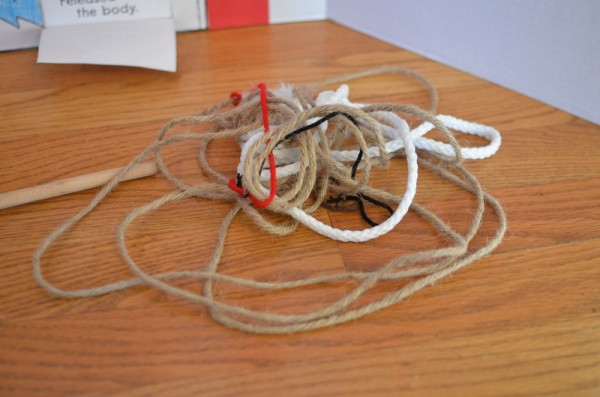
This one really floors the kids.  The idea for this demonstration came from a combination of one of the hands-on labs included in our Real Science Odyssey Life Level One curriculum (a good example of the simple activities that curriculum includes for hands-on learning) and the Science Matters blog.  We cut various strings and yarns to the length of the actual organs in the digestive system.  I liked the idea of making each item a different color or thickness to more clearly show the relative sizes.  This is an easy one to just use what you have (rope, yarn, string, twine, flexible tubing, even a bag or bottle for the stomach if you’d like) to demonstrate the true-to-life measurements of a child’s digestive system.   My son LOVED unrolling this one at the science fair.

  • mouth (3 inches)
  • esophagus (10 inches)
  • stomach (6 inches)
  • small intestine (15 feet)
  • large intestine (4 feet)

Trust me, everyone’s eyes get big when you unroll the rope and tell them that their digestive system is that long, all coiled up inside their body.

Digestive System Length

*Note: if you like using accurate vocabulary, this was a great way to also demonstrate the difference between the small intestine and large intestine.  I used a thin rope for the small intestine and a thick rope for the large.  It helped my son understand (and then explain to others) that the small intestine is actually much longer than the large intestine, but is smaller in diameter.

Resources:

Other than the specific resources I listed already, these are the books and other things we used to learn all about the digestive system.

Magic School Bus Human Body: I love this DVD, and in the episode called “For Lunch” the bus travels through Arnold’s digestive system.

Easy Make and Learn Projects: Human Body has a terrific digestive system poster with flaps.  We blew this up and used it as our display at science fair.

Blood and Guts: This book has fun-to-read explanations and a lot of hands-on demonstrations and experiments for the entire body.

Kidshealth.org has a short video on the process of digestion.

Have fun with hands-on learning about the digestive system!

Our Homeschool Journal: Gearing Up for Science Fair

When I looked over our scheduled events for the week and also realized we needed time to prepare for the science fair we’re participating in next week I decided to throw our regular schedule out the window.  I called it a “project week” but the kids ended up calling it “fun school.”  Part of me wishes we could roll this way all the time, but those pesky math facts and grammar rules just won’t let me do it.

In our homeschool this week…

Our work at home has been all about the science fair we’re participating in next week.  I’m so excited and thankful for a veteran homeschool mom who put the whole thing together.  I’ve always wanted to have a reason to buy those three-panel display boards!  I’ll share all the details on our projects when they’re complete.

We also followed a little interest-led learning after a mild earthquake hit Maine this week!  It’s effects didn’t reach our area, but my mother called when she felt shaking at her house.  My husband did a mini-unit with the kids on earthquakes to answer all their questions.  Believe it or not, in a huge coincidence my son had picked out an earthquake nonfiction book at the library last week.  We also watched a Bill Nye earthquake video on YouTube.

Places we went and people we saw…

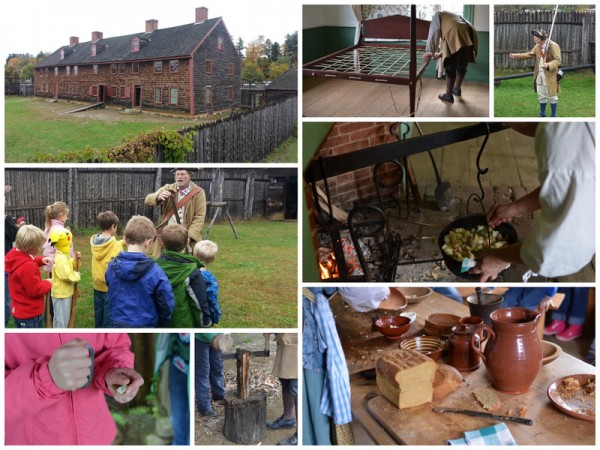
Old Fort Western

One of our major events was a field trip to Old Fort Western in Augusta, Maine.  Built in 1754 it’s New England’s oldest surviving wooden fort.  Dad joined little brother as he experienced life as a soldier, including drills and moving and firing a cannon.  Big sister and I dove into household chores: working in a smoky kitchen, tightening a rope bed, even chopping wood for the fire.  Any time I feel overwhelmed I need to spend a day living the life of colonial women.

We also had Girl and Boy Scout meetings, my daughter’s book club, a homeschool group meeting, and took a day today to visit Grandpa for his birthday.

We’re reading…

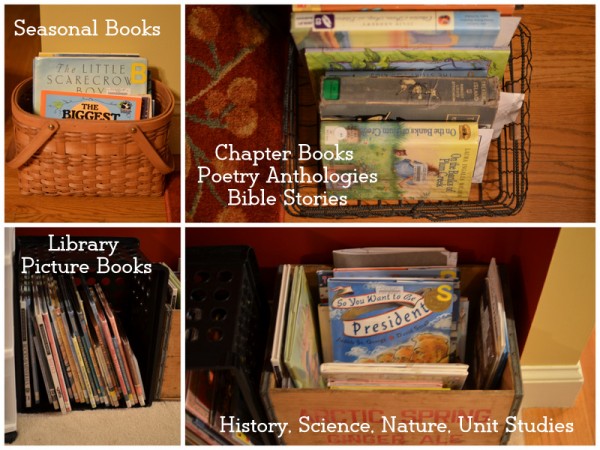
In honor of Mary at Homegrown Learners and her posts about reading aloud, I thought I’d share a little more in-depth on what we work on for read alouds.  Reading aloud truly is the backbone of our homeschool, and almost anything we’re learning about starts with books.  Here’s a collage to illustrate what I mean:
Read Alouds

There is a basket of seasonal books just for fun in the living room; right now they’re about fall and Halloween.  I am slightly addicted to picture books for holidays and have a closet where I keep the off-season books, plus I also grab more at our library.  Beside the couch is a metal basket with our morning books (poetry and Bible) along with our current family chapter books (Treasure Island, On the Banks of Plum Creek).

In the schoolroom there is a crate of library books–you never know what you’ll find here, but we usually have 30-50 books checked out at one time.  I love my small-town library and the wonderful librarians there!  Mary is so right when she says they are a valuable resource.  Lots of these are just for fun, whatever the kids or I see that’s interesting on our regular library trips.  (Like the earthquake book!)  Also in the schoolroom is a wood crate with specific books I’ve chosen to go along with our studies.  For instance right now it holds books for our Government and Elections Unit Study, Brazil for Geography Club, and our upcoming nature study focus on trees.

Thank you to the wonderful hostesses with fun link-ups on Fridays.

Be sure to join the fun and see what other homeschoolers are up to!

Geography Resources: Brazil

Geography Resources: Brazil

A group of homeschool moms and I formed a geography club this year.  We were looking for a way to get together regularly for something educational but not expensive or requiring extensive planning.  We meet weekly in a room we reserve at the library, and we focus on one country for the whole month.  Each child is responsible for bringing something to share about the country–anything goes! I thought I’d share some of the resources I found and things that were shared at our club meetings.

This month the country was Brazil!

Internet Resources:

Education Place is my go-to for printable outline maps, available with and without labels.

Homeschool Share’s Brazil Lapbook page has maps and minibooks.

Jolanthe at Homeschool Creations posted about her Brazil unit and offers a free map and flag printable, along with other links and ideas.

National Geographic Kids is a terrific resource for great photos, information, and even a short video.

Erica at Confessions of a Homeschooler shares about their study of Brazil.  She wrote her own “Expedition Earth” curriculum and Brazil is the country she offers as a free preview!  Her family made an amazing multilayer diorama of the rain forest.

Books:

We own a Children’s Atlas of the World (ours is no longer available on Amazon) as a reference book.  I appreciate it’s colorful pages, maps decorated with small pictures of animals, landmarks, agriculture, industries, or architecture specific to an area, and even some project ideas.  A children’s atlas is a great place to start for a quick overview of a country and to see what items may pique your children’s interest.

Magic Tree House Research Guide: Rain Forests: I love the nonfiction companion books in the Magic Tree House series (sometimes called “research guides” or “fact trackers”).  We enjoy the chapter books but usually only read them once, while the nonfiction books I enjoy adding to our library.  It’s nonfiction but still has the personality of the characters that makes it a more interesting read for kids.  This one has great information on the amazing features of rain forests.  Of course, rain forests are located in many parts of the world so this book isn’t specific to Brazil, but a study of Brazil isn’t complete without studying the Amazon Rain Forest.
Children Just Like Me:  This book gives kids a window into the lives of children around the world.  For Brazil the child is a member of the Tembe Indian tribe in the Amazon rain forest.  Considering that it isn’t a good representation of life for the children in the large, populated cities of southeastern Brazil, but certainly a very unique lifestyle.

Cultures of the World: Brazil  and Children of the World: Brazil are reference books we checked out from our library.  They’re long and full of information, so we usually do a picture walk and just read pieces of interest as we go through.

Geography Club Meetings:

Just in case you want to start a geography club of your own, or just have some fun with your own children, these are some of the activities we enjoyed and information we shared on our month-long Brazilian study.

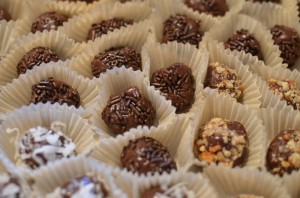
  • Brigadeiros: two of us chose to bring these chocolate treats to one of our meetings.  They are simple and rather tasty, and kids can help shape them into balls and roll them in toppings.  We used this recipe from All Recipes.  Interesting note: these are served at children’s birthday parties and are expected, much as someone in America expects a birthday cake.


Brazilian Desserts: Brigadeiros

  • Children’s birthday parties in the larger cities are a large event requiring a rented location, hired entertainment, and lasting well past most of our children’s bedtimes.  This blog post gives a humorous look into what a huge event the parties can be.
  • Sugar Loaf Mountain is a landmark as you enter the harbor for Rio de Janeiro.
  • Also in the famous city of Rio is the Christ the Redeemer statue, measuring over 100 feet tall and nearly 100 feet from fingertip to fingertip.
  • The rain forest is teeming with amazing creatures: we shared mini reports on two:
    • The goliath bird-eating tarantula, which is up to 12 inches long including its legs.  There is an amazing video from National Geographic, but be cautious if your children are sensitive as the large, creepy spider does catch his mouse prey:  goliath tarantula video.
    • The red-eyed tree frog, a creature that is more on the “cute” than “creepy” side.  There is great information and a video on National Geographic kids: red-eyed tree frog video.
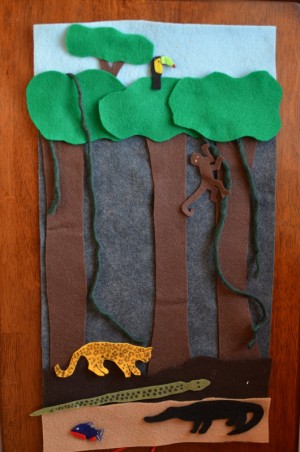
  • Speaking of the rain forest, we actually shared this rain forest felt play set in our book club last year when we read the Magic Tree House Afternoon on the Amazon.  I cut all the shapes out of felt and went over the layers of the rain forest and animals that live there using the play set.

Homemade Rain Forest Felt Playset


  • Our friends shared children’s games common in Brazil: “Vivo ou Morto” (dead or alive, which reminded me of a cross between Simon Says and Red Light, Green Light) and Cinco Marias (like Jacks with stones).
  • We learned to say hello in Brazilian Portuguese, and also to count to 10.  We practiced this by tossing up a balloon and counting our hits aloud.
  • Our soccer-loving member shared about Pele, the famous soccer (or should I say “futebol”) player from Brazil.  They had read the book Pele, King of Soccer.
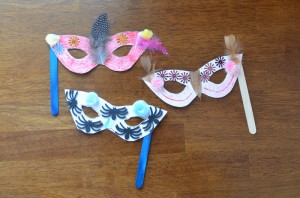
  • Brazilians are well known for their celebration of Carnival (a four day national holiday just before Lent).  Since Brazilians wear costumes to celebrate Carnival, our friends bought supplies to make Carnival masks for one meeting.  They brought stiff paper mask templates and things like pom poms, feathers, sequins and stickers to decorate them.

Brazilian Carnival Masks

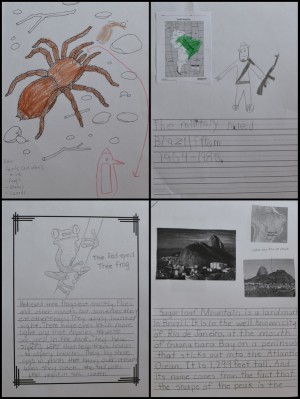
*As a side note: notebooking is one of my favorite and most-used homeschool tools.  It can work for any age, any subject!  I had my children complete notebook pages for topics we studied about Brazil, and they shared from these at our meetings.  Then we’ll include those notebook pages in our binders at home.  (Notebooking pages used were free resources from  Jimmie at the The Notebooking Fairy, Donna Young, and a coloring page found via a Google Image search.)

Notebooking for Geography: Brazil


We all enjoyed our first month of geography club.  In addition to being able to get together regularly with friends and learning about a different country, it gave our kids a low-key way to practice public speaking.

Next month: Egypt!


Hi, I'm Heidi and I homeschool my two sweet kids. I want them to know that learning is an exciting lifelong adventure! We love great books, unit studies, notebooking, lapbooking, and hands-on learning.
Subscribe

Subscribe via e-mail: